Pages

Tuesday, June 28, 2016

2016 Top 5 Blu-ray Ripper for Mac Review

If you want to get a best Blu-ray Ripper, this guide will be helpful. It shows you top 5 Blu-ray Ripper reviews here. Pick one you like.
 
Collect a lot of Blu-ray discs at home and wanna rip them for easily playing on HDTV/Smart TV/Portable devices? For these purposes, the best Blu-ray ripping program is necessary. In this article, we will list 2016 Top 5 Blu-ray Ripper for Mac Review for you. Choose one you prefer.


Top.1 Brorsoft Blu-ray Ripper for Mac – Excellent (Windows version)


The good: Support almost all kinds of BD/DVD sources: protected and unprotected Blu-ray Disc, BDMV folder, BD ISO, physical DVD, VIDEO_TS folder, DVD ISO and IFO file. As a professional and powerful all-in-one Blu-ray/DVD disc handling tool, it integrates DVD/Blu-ray Ripping, Conversion, and Backup.

One : Back Up Blu-ray/DVD disc into digital folder

"Full Disc Copy" feature can copy Blu-ray/DVDs into BDMV/Video_TS folder with all subs tracks, audio streams and chapter information included. "Directly Copy" can help you save 100% intact M2TS/VOB main movie from your Blu-ray/DVD Disc without any quality loss.

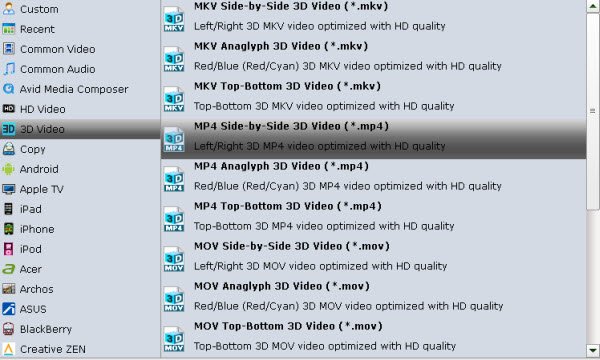
Two: Rip Blu-ray/DVD to Any Format and Device

3D Blu-ray discs, 2D Blu-ray discs, and standard DVDs can be converted to all popular SD and HD (3D) video formats like AVI, MP4, WMV, MOV, FLV, MKV, 3GP, MPEG, TP, TRP, HD AVI, HD WMV, HD MOV and more. Meanwhile Brorsoft Blu-ray Ripper also provides the preset formats for over 150 popular devices. Simply select the profile to rip Blu-ray/DVD for play back on your device with optimized settings and never worry about the video incompatibility!

The bad: Although the interface is easy to understant, it need to be improved.

Top 2. Aiseesoft Blu-ray Ripper for Mac – Good
 

The good:  Aiseesoft Blu-ray Ripper for Mac well deserves its high reputation in decryption, and it handles not only AACS, BD+, Region code restriction, but also Cinavia protected Blu-rays. If you want to rip a Blu-ray to MKV and keep 2 audio language and external subtitles, Aiseesoft would be your choice.

The bad: It is lacking of DVD ripping feature. It does not support AMD APP encoding. The interface is not very intuitive.

Top 3. Xilisoft Blu-ray Ripper for Mac– Good

The good: Xilisoft Blu-ray Ripper can support standard Blu-ray videos as well as 3D Blu-ray videos to SD and HD video formats such as MKV, AVI, WMV, TS, etc.

The bad: The app does not decrypt Blu-ray protections and requires AnyDVD HD to be installed in advance for Blu-ray ripping. DVD disc is not supported.
 

Top 4. Leawo Blu-ray Ripper for Mac– Fair

The good: It comes with the common feature to convert Blu-ray to regular video formats (M2TS, AVI, MP4, WMV, FLV, MPEG, MOV, MKV, RMVB, etc). It also has basic editing feature including trimming and cropping.

The bad: Not support Blu-ray ISO or forced subtitle (if there is); no backup option for keeping original movie quality.

Top 5. DVDfab Blu-ray Ripper for Mac – Fair

The good: DVDfab Blu-ray Ripper well deserves its high reputation in decryption, and it handles not only AACS, BD+, Region code restriction, but also Cinavia protected Blu-rays. If you want to rip a Blu-ray to MKV and keep 2 audio language and external subtitles, DVDfab would be your choice.

The bad: It is lacking of DVD ripping feature. The interface is not very intuitive. And DVDfab Blu-ray Ripper for Maccosts more than its alternatives.


Friday, June 24, 2016

How to Rip Blu-ray/DVD to Qnap NAS for streaming

This step-to-step guide will teach you how to lossless backup DVD /BD to QNAP NAS for streamimg.


If you have tons of Blu-ray/DVD collection and want to copy them to QNAP NAS for more convenient playback via streamers like PS4, WD TV, Apple TV 4, Popcorn Hour etc, you need to convert and rip Blu-rays/DVD to QNAP NAS compatible video format first. Here is how to.

What you need: A professional BD/DVD to Qnap NAS converter tool

Brorsoft Blu-ray Ripper is highly recommended here, which runs as the the top of the list of the best Blu-ray rippers.

In general, it is capable of ripping Blu-ray including 3D to any common video format you want like MPEG-2, MPEG-4, WMV, MKV, MOV, FLV, AVI... With it, you can fast convert Blu-ray/DVD to Qnap NAS optimized format while compressing 1080p Blu-ray to a more suitable size for streaming. If you are a Mac user, pls turn to Brorsoft Blu-ray Ripper Mac version. Now download the tool and learn how to do it.

How to Rip Blu-ray/DVD to Qnap NAS for streaming

Step 1: Launch the Blu-ray ripping program for NAS . Then click "Load" disc button to import the BD/DVD files you want to convert. To select the subtitles you like, simply click Subtitle and select the one you prefer.


Step 2: Click Format bar and choose your desired format. To store hundreds of BD/DVDs on NAS, you can rip BD/DVD to .mp4, or .avi, .mkv, etc compressed format. And click Settings bar, you can adjust the level of compression to suit the quality you want.


Step 3: Tap the "Convert" button to start ripping Blu-ray/DVD to Qnap NAS for DLNA streaming.

After the conversion, click Open button to find the output files. Make sure the wireless network connection is accessible among the NAS and Apple TV, PS3, HD TV or other media players. Then just enjoy the high quality BD/DVD movies anywhere anytime.

Read More:

Tuesday, June 21, 2016

Freely Stream 3D Blu-ray via iTunes with 3D Effect

Have you ever thought of ripping 3D Blu-ray to iTunes with 3D effect for playing on iPad or any other device? This guide will show you how to rip Blu-ray to iTunes.

 
"Hi, is there anyone here know how to add Blu-ray movies to iTunes? I need to transfer these movies to my iPad so that my little daughter can enjoy any where. By the way, the Blu-ray movies are 3D. Is it possible?"

Have lots of 3D Blu-ray discs to rip in your collection, and want to put them in iTunes so that you can view at will on any of the screens via Apple TV? You are in right place. This article will teach you how to stream 3D Blu-ray via iTunes with 3D Effect.

To put 3D Blu-ray onto iTunes for syncing, you need a Blu-ray to iTunes ripper program to remove the protection and rip 3D Blu-ray movie to iTunes compatible video first. Here comes Brorsoft Blu-ray Ripper for Mac to help you achieve the goal. It can convert 2D/3D Blu-ray, DVD and ISO image files to a iTunes compatible video formats for streaming to portable devices. If you are a PC user, pls turn to Brorsoft Blu-ray Ripper Windows version. Now, download the software and follow the guide below to start ripping.

How to Add 3D Blu-ray to iTunes with 3D Effect

One: After installing, launch the Blu-ray to iTunes Converter app on your computer. and then press "Load Disc" icon to import 3D Blu-ray movie.


Two: Click the format bar to follow "3D Videos" and choose the 3D MP4 format which is most compatible with iTunes.


Tip: If you need, you can also click "Settings" to modify parameters of your output profile to meet your professional needs: bit rate, frame rate, aspect ratio, etc.

Three: The final step is to tap the Convert button and commence converting 3D Blu-ray movies to iTunes files.

After the conversion, click on "Open" button to access to the videos you ripped. Open your iTunes and import the Blu-ray (now in iTunes friendly video format) to its Movies library by clicking File -> Add File to Library. Enjoy!

Read More:

Losslessly Rip Blu-ray to MKV on Mac

Friday, June 17, 2016

Best way to Rip TV Series DVD to Episodes for Plex

Looking for a best tool to rip TV Series DVD to Episodes for Plex? This article will give you some clues. Keep reading.


While the world has clearly moved on to HD video, many of us still have massive TV Series DVD collections and would like to make this content available digitally so that it can be enjoyed on mobile devices and streamed to screens around the home via Plex or similar solutions. So, here is the best way for you to rip TV Series DVD to Episodes for Plex.

To achieve the goal, Brorsoft DVD Ripper is highly recommended here. This DVD Series to Plex ripper can copy any copy-protected, even region-locked DVD to Plex supported format with excellent video quality. It can make you rip more DVD TV series to Plex than Handbrake in the same time period. What’s more, you are allowed to adjust video/audio bitrate, size, frame rate, channel in "Settings". If you are a Mac user, pls turn to Brorsoft DVD Ripper for Mac. Now, download the software and start conversion.

How to Convert TV Series DVD to Episodes for Plex

One: Click DVD disc button to import the DVD files you want to convert. After the files are loaded, select the episodes you want to rip by clicking the box. DVD folder/ISO/IFO files are also supported.


Two: Click the "Format" > "Common Video" option, and choose MP4 format recognized by Plex as output format. You also can select H.264 HD Video (*.mp4) for Plex Media Server.


Tip: With the right settings you can retain the quality of the original DVD while also saving space. Simply click Settings bar and you can tweak the settings to your satisfaction and even save it as preset.

Three: Tap the "Convert" button under the preview window, and the DVD ripper will start the conversion from TV Series DVD to Plex Media Server. Once the conversion finished, you can get the video file via "Open" panel. And now, you can freely stream the videos to Plex without any issue.

Read More:

Tuesday, June 14, 2016

How to Copy and Rip Redbox DVD movies

Wanna play Redbox DVD movies without limitation? Just follow this article to rip Redbox DVD to the video format you want!" 


Redbox, featuring automated retail kiosks in red for DVDs, Blu-rays and video games rental, drives consumers to get wanted DVD movies in a pretty convenient way. Many movie lovers prefer to rent DVD movies with a cheap price rather than purchase the fragile DVD discs. Most of them have demand to rip Redbox DVD to computer so that they can watch it some other time or transfer it to your portable devices.

"I rent some classic DVD movies from Redbox. And I wanna copy and save them on my computer. Do you have some efficient way to Copy and Rip Redbox DVD movies? Thanks for any tip."

In fact, it's not hard to find software to software to rip or decrypt a Redbox DVD based movie. Here we recommend you Brorsoft DVD Ripper for Mac. With decent decrypting capability, high quality video output and considerate backup solution, it is considered the best tool for you. With this DVD ripping/copying software, you can fast rip and copy your Redbox DVD movies as easy as possible. If you are a Windows user, you can use the equivalent Brorsoft DVD Ripper to rip and backup Redbox DVD rentals on Windows 10/8/7.

How to Put Redbox DVD movies to computer and devices

Step 1. Add disc

Insert the DVD disc into the computer driver, you can add the DVD movies you want to rip by clicking the "disc" button on the main interface.


Step 2. Choose output

Option A  - Click "Format" bar to get the format list and select a proper export format. As you can see, various regular video formats like MP4, MOV, MKV, FLV, WMV, AVI, etc. are available in the "Common Video" profile.


Option B - If you just want to copy Redbox DVD with original structures, please apply the "copy the entire disc" option.

Option C - If you just want to copy main movie from Redbox DVD without extras, commentary etc. documents, please choose "Copy" > "Directly Copy" from the Format menu.


Step 3. Start conversion

Finally, click the "Convert" button on the main interface to start converting Redbox DVDs to a video format you set.

Once the conversion is finished, get the output videos via clicking the Open button. Afterwards, you can play the converted Redbox DVD movie files anywhere anytime you want.

Read More:

Freely Copy Netflix DVD on Mac

Friday, June 10, 2016

How to Add Blu-ray collection to iTunes on Mac

Learn how to Rip Blu-ray Movies into iTunes easily so that you can relax and enjoy them on your iOS devices, like Apple TV, iPhone, iPad .etc.


"I really want to put DVDs and Blu-ray collections to iTunes so that I can enjoy the movies on Apple TV, but I don't know how. Is there anything that I have to download for it?"

Ripping Blu-ray movies into iTunes still carries a lot of debate around the legalities of taking content you own and changing the format for digital streaming. In this article, you will learn how to freely add Blu-ray collection to iTunes on Mac.

Output File:

As we all know, iTunes only supports several video formats including MOV, MP4, M4V. If you wanna stream Blu-ray collection to iTunes, you'd better encode Blu-ray movies to iTunes friendly formats first.

Tools Needed:

To complete the ripping, a tool is needed which you can use to remove the strict Blu-ray protection and region restrictions and rip Blu-ray movies to iTunes video very quickly while retaining great video quality. Brorsoft Blu-ray Ripper for Mac is an ideal app for you to rip Blu-ray to iTunes(iTunes 11), iPad, iPod/iPod Touch, Apple TV, iPhone and more. If you are a PC user, pls turn to Blu-ray Ripper Windows version. Now just download it and follow the tutorial below to rip and import Blu-ray movies to your iTunes (iTunes 11) library.

How to Convert Blu-ray movie to iTunes

One: Insert the Blu-ray disc you want to convert into your BD drive and click "Load Blu-ray" icon to import the Blu-ray movies.


Two: Click the drop down box of "Format", through which it is possible to select iTunes highly compatible format like H.264 MP4, MPEG-4 from "Common Video" profile list. If you want to add the Blu-ray movie to iTunes for play on iPhone, iPad, iPod, Apple TV, etc., you can also directly select iPhone, iPad, Apple TV or iPod as the output format to get videos with optimized settings for your iDevices.


Tip: If you need, you can also click "Settings" to modify parameters of your output profile to meet your professional needs: bit rate, frame rate, aspect ratio, etc.

Three: The final step is to tap the Convert button and commence converting Blu-ray movies to iTunes files.

After the conversion, click on "Open" button to access to the videos you ripped. Open your iTunes and import the Blu-ray (now in iTunes friendly video format) to its Movies library by clicking File -> Add File to Library.

Read More:

Losslessly Rip Blu-ray to MKV on Mac

Tuesday, June 7, 2016

How to Stream DVDs into Emby Media Server

This article will teach you how to make your Emby Media Server recognize and stream DVD movies.


"I have a lot of DVD discs colleaction. I am now wanting to play them through my ROKU. Emby sounded like a good method. Howeever, Emby seems to not be recognizing any of it at all. Do you know how to stream DVDs into Emby Media Server.

Emby Media Server is a good media server to store your Blu-ray backups. It brings all of your DVD collections together into one place and streams your DVD movies on-the-fly to play on any device. Then how to reach? You can use Brorsoft DVD Ripper to help you rip commercial DVD discs to Emby Media Server.

Overall, it is the best DVD ripping program that helps you effortlessly finish the DVD conversion bypassing DVD copy protection. With it, you can convert DVD to almost all regular video formats for Emby Media Server like MP4, MOV, MKV, FLV, WMV, AVI, etc. If you are a Mac user, pls turn to Brorsoft DVD Ripper for Mac. Now, download the software on computer and follow the guide below to start conversion.

How to Encode DVDs for Emby Media Server

1. Insert DVD disc to the drive, then launch the DVD converter and click the "Disc" button to import the Disc content. VIDEO_TS folder, DVD ISO files are also supported.


2: Click Format bar and choose a compatible format for Emby Media Server. MP4, MKV from Common Video are the proper choice.


Tip: If you like, you can go to "Settings" to change the video encorder, resolution, frame rate .etc.

3: Tap the "Convert" button at the bottom of the main interface to start the DVD to Emby Media Server conversion.

Once the conversion is done, click "Open" to quickly find the converted movies. Then, it would be easy for you to play DVDs through Emby. Enjoy.

Friday, June 3, 2016

Easy way to Upload DVD to YouTube

This tutorial will show you how to convert DVD to YouTube supported video formats so that you can upload DVD to YouTube to share with the world.


A big YouTube fan and love to upload your favorite DVD movies to YouTube? In this article, you will learn how to easily upload DVD to YouTube to share with your family members, friends, colleagues, etc.

YouTube allows you to upload videos in almost all popular video formats like FLV, AVI, MOV, WMV, MPEG, MP4, MKV, etc to share with the world in minutes. It's clearly that DVD is not on the list. To share DVD on YouTube, you will need to rip DVD movies to YouTube friendly formats first.

To do this, Brorsoft DVD Ripper for Mac is highly recommended here. It is easy for you to rip DVD movies to YouTube FLV, AVI, etc videos with this DVD ripping software. In addition, it also can split the files for you if you think it is too long for YouTune to accept. For PC user, pls turn to Brorsoft DVD Ripper Windows version. Now, download the software on computer and follow the guide below to start conversion.

How to stream DVD movies to YouTube

One: Run the program and load your DVD into the program via disc button. DVD folder, ISO/IFO files are also supported here.


Two: (Optional) Click Edit to open the Video Editor Window. As you see, you can trim, crop or adjust the video with the built-in video editor to get the very part and effect of the movie you want. (Note that if your YouTube account still won't accept videos that are longer than 15 minutes, you need to cut or split the DVD movies into smaller parts so as to share on YouTube.)


Three: Go to "Format" bar to choose a proper format for YouTube.


Four: When all these settings are ready, you can click the "Convert" button to begin the DVD to YouTube conversion. When the ripping is done, you can click on "Open" button to locate the ripped videos.

How to load video to YouTube
1. Sign into YouTube.

2. Click the Upload link at the top of the page.

3. Select the video you'd like to upload from your computer. (Enter as much information about your video as possible, including Title, Description, Tags, and Category.)

And what we have left is just to follow its instructions. Broadcast yourself now!